

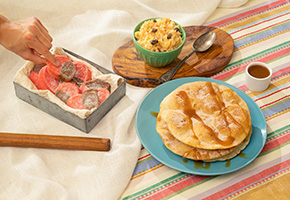
Recipe excerpt from:
The Whole Enchilada: Mexican Recipes full of History and Fun
by Glenda Galvan-Garcia
Makes about 20 cookies
- ½ cup unsalted butter or lard, at room temperature
- ½ cup butter flavored shortening
- 1¾ cups powdered sugar
- 1 large egg
- 2 teaspoons vanilla extract
- ¾ teaspoon baking powder
- ½ teaspoon sea salt
- 2¼ cups all purpose flour
- 2 tablespoons cocoa powder
- Red food coloring
- 1 tablespoon granulated sugar, for dusting
- Place butter and shortening in a stand mixer. Mix on high for 30 seconds. Turn off the mixer and scrape the sides of the bowl. Mix on high until smooth. Turn off the mixer, add the powdered sugar, and mix for 30 seconds, gradually moving up to high speed. Turn off the mixer and scrape the sides of the bowl again. Mix until blended.
- Add the egg and vanilla extract and mix until combined. Turn off the mixer and add baking powder, salt, and half the amount of flour. Mix at medium speed until you get a smooth consistency. Add the remaining flour and continue mixing until the dough comes together and there are no streaks of flour. (Do not overmix the dough as it will result in tough cookies.)
- Remove the dough from the bowl and split it in half. Each half should measure about 1⅓ cups. Place them in separate medium-size bowl.
- Add cocoa powder to one dough half and knead it gently with your hands until it is uniform in color. To the remaining dough, add about 5-6 drops of red food coloring to make it pink. Knead it gently with your hands until the color is mixed throughout.
- Cover each dough with plastic wrap and refrigerate them for 15 minutes.
- Remove the plastic wrap. Sprinkle flour lightly onto a cutting board and roll each dough separately with your hands to form a log; about 1½ inches wide and 11-12 inches long.
- Press the doughs together in one log and roll until the dough is smooth. Wrap it in plastic.
- Place the dough in the freezer for 30 minutes. Preheat the oven to 350° F and line two baking sheets with parchment paper or silicone liners.
- Place the dough on a cutting board. Remove the plastic wrap. With a sharp knife, cut slices ½-inch thick.
- Place the dough slices on the prepared baking sheets, about 2 inches apart. Bake them for 12 minutes. The dough will appear dry on the surface and will not sink when you touch the top of the cookies.
- Remove the cookies from the oven and allow them to cool for about 3 minutes. While still warm, sprinkle a bit of sugar on top.
Pro Tip! These cookies are best enjoyed within two days—if they last that long!
